Despite only being in Early Access, Colony Survival is already proving to be a quite popular first-person survival game. However, as many players have noted, the addition of some sort of Creative Mode would be a huge boon for the game’s popularity.
Creative Modes allow users to fully flex their imaginative muscles — yet there isn’t a proper way to do so in Colony Survival. However, some players have found ways to mod the game to allow for more creative freedom.
Credit for this method goes to Steam user P5ykoOHD for introducing many players into editing the game’s code to enable something akin to a Creative Mode. It is important to note that, as is the case with editing any in-game files, tinkering too much can potentially break the game entirely. However, this guide will go over one of the safest ways to implement Creative Mode correctly.
Using Mods to Enable Creative Mode in Colony Survival
Modding Colony Survival requires finding the game’s files in your directory and editing some key .json files. This can be done using your computer’s standard Notepad functionality. However, it is recommended to use an application like “Notepad++” or a similar tool to properly display the code.
The .json files we will be editing are:
- Types.json
- Player.json
- Serverperclient.json
- Server.json
- Settings.json
Remember to make a backup of all files you attempt to change, just in case.
Step 1: Edit Types.json
First, you’ll want to open Types.json in your game files so that you can expand your inventory for all the resources your creative endeavors will require.
Editing this portion allows you to change the amount of stacks you have accessible in your inventory. P5ykoOHD provides a specific download link for editing all of the stacks in this section to 10,000 — allowing for near limitless use of inventory space.
Step 2: Edit Player.json
Now it’s time to edit the Player.json file to give yourself near-limitless resources. The file location for this section is:
D:SteamsteamappscommonColony Survivalgamedatasavegames[your world]players
Look for the following section in this file’s code:
“inventory” : [
{
“type” : “bla bla bla”,
“amount” : 50
},
],
“stockpile” : [
{
“type” : “(see list below)”,
“amount” : 50
},
],
The stockpile section is what you’re going to be actually editing to get unlimited items. Copy and paste the following into the stockpile section to acquire near-infinite amounts of each resource you could possibly need:
“stockpile” : [
{
“type” : “grasstemperate”,
“amount” : 999999
},
{
“type” : “grasstundra”,
“amount” : 999999
},
{
“type” : “grasstaiga”,
“amount” : 999999
},
{
“type” : “grasssavanna”,
“amount” : 999999
},
{
“type” : “grassrainforest”,
“amount” : 999999
},
{
“type” : “straw”,
“amount” : 999999
},
{
“type” : “sand”,
“amount” : 999999
},
{
“type” : “snow”,
“amount” : 999999
},
{
“type” : “clay”,
“amount” : 999999
},
{
“type” : “dirt”,
“amount” : 999999
},
{
“type” : “adobe”,
“amount” : 999999
},
{
“type” : “logtemperate”,
“amount” : 999999
},
{
“type” : “planks”,
“amount” : 999999
},
{
“type” : “redplanks”,
“amount” : 999999
},
{
“type” : “blackplanks”,
“amount” : 999999
},
{
“type” : “coatedplanks”,
“amount” : 999999
},
{
“type” : “plasterblock”,
“amount” : 999999
},
{
“type” : “stonebricks”,
“amount” : 999999
},
{
“type” : “bricks”,
“amount” : 999999
},
{
“type” : “leavestemperate”,
“amount” : 999999
},
{
“type” : “leavestaiga”,
“amount” : 999999
},
{
“type” : “cherryblossom”,
“amount” : 999999
},
{
“type” : “torch”,
“amount” : 999999
},
{
“type” : “cherrysapling”,
“amount” : 999999
},
{
“type” : “sappling”,
“amount” : 999999
},
{
“type” : “flaxstage1”,
“amount” : 999999
},
{
“type” : “wheatstage1”,
“amount” : 999999
},
{
“type” : “berrybush”,
“amount” : 999999
},
{
“type” : “crate”,
“amount” : 999999
},
{
“type” : “workbench”,
“amount” : 999999
},
{
“type” : “mint”,
“amount” : 999999
},
{
“type” : “shop”,
“amount” : 999999
},
{
“type” : “grindstone”,
“amount” : 999999
},
{
“type” : “furnace”,
“amount” : 999999
},
{
“type” : “oven”,
“amount” : 999999
},
{
“type” : “bed”,
“amount” : 999999
},
{
“type” : “bread”,
“amount” : 300
},
{
“type” : “arrow”,
“amount” : 300
}
],

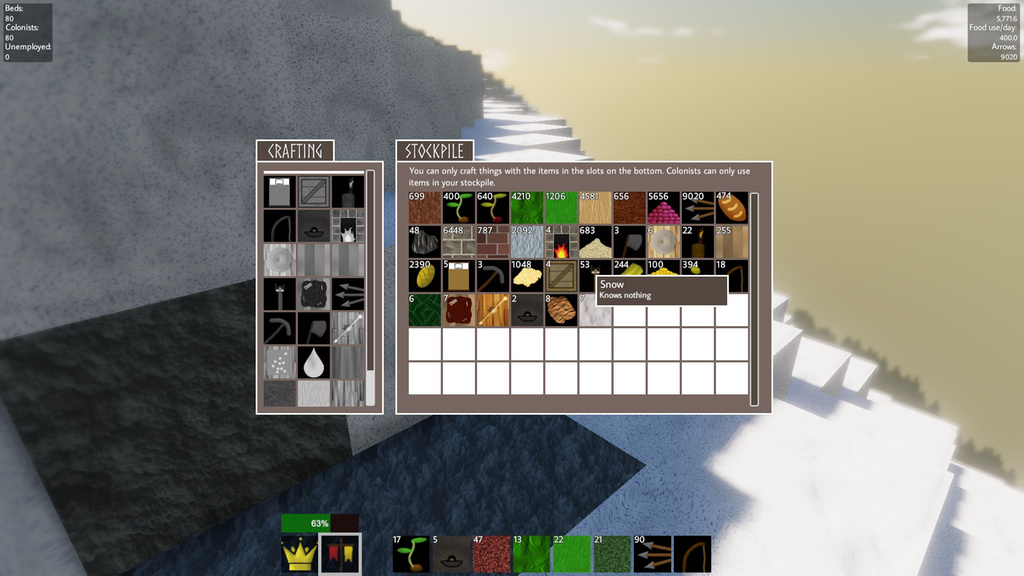
If you’ve done it right, you’ll have loads of stuff in this inventory screen.
Step 3: Edit Serverperclient.json
Find the following file location to edit the build distance and fall damage of the player character:
D:SteamsteamappscommonColony Survivalgamedatasettings
Once you’re in the right directory file, follow these steps:
- Find the properties “BuildDistance,” “AutoBuildCooldown,” “FallDamageBaseDamage,” and “FallDamagePerUnit.”
- Edit the BuildDistance so that the value is right for you. (Between 20-30 is usually a good baseline to ensure you aren’t building too far away or too close to the character.)
- Lower the AutoBuildCooldown so you can place blocks quickly
- Set fall damages to 0 for easier building
Step 4: Edit Server.json
This file’s location is the same as Serverperclient.json, but you will need to navigate to the “Player” section. It is located at the end of the file, and allows you to maximize the amount of health you have.
Change “Starting Health,” “HealthRegenerateMax,” and “HealthRegenerationSpeed” to 1000.
Step 5: Edit Settings.json
The file location for this step is:
D:SteamsteamappscommonColonySurvivalgamedatasavegames[your world]
Modifying this code lets you turn zombies on and off at your choosing. So of course, you’ll want to find the zombie setting and set it to inactive. This is helpful when you don’t want to bother with any of the survival aspects of Colony Survival.
—
With all of these options implemented, you will be able to create your own makeshift Creative Mode in Colony Survival, allowing you to create structures as you please. Once again, it is important to backup any files you are looking to change in case you don’t get it quite right and need to revert back to your original settings.
If you need a bit of extra help surviving while you get Creative Mode up and running, check out our other Colony Survival guides for even more tips!


Published: Jul 25, 2017 01:39 pm