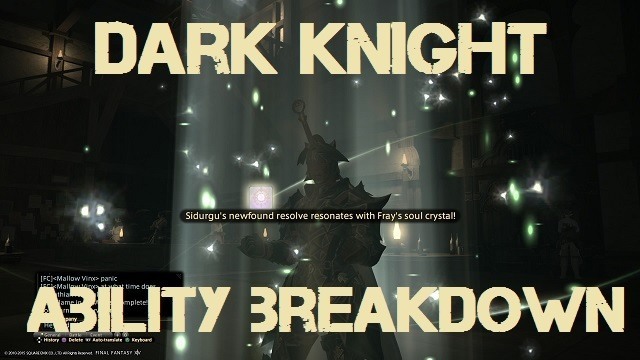
Dark Knights (which in this guide from now on will be referred to as DRK) are the third tanking job to be released in Final Fantasy XIV: Heavensward expansion, and come with a variety of tools to use when tanking. This guide will breakdown the abilities used when tanking as wall as give tips to use when performing these actions. Due to the job still being new and changes are constantly being made to the job, I will update and edit this guide as changes are made.
The majority of this guide is into three main sections: physical abilities, magical abilities and defensive cooldowns. Each section will have the abilities listed, their effects, and a few examples on how to effectively use that ability.
Physical abilities
These are going to be the most used abilities for the DRK job. It is important to note that while they are physical moves, while under the effect of Darkside all physical moves will drain MP as if they were magic moves. Physical moves like other mêlée and ranged jobs, drains TP as well however the actual TP usage as a DRK is considerably less than other jobs unless the battle drags on for long periods of time.
Hard Slash (Level 1)

Delivers an attack with a potency of 100.
This is going to be your basic combo opener. While it doesn’t so too much damage, it is an essential part of the DRK moveset.
Spinning Slash (Level 4)
 Combo action: Hard Slash. Combo potency: 220.
This is the enmity generator that opens up the enmity combo for DRKs. It actually generates a good amount of enmity towards the target and does a decent amount of damage as well.
Scourge (Level 6)
 Damage duration: 15 sec (initial) 30 (after reaching level 32) DoT potency: 40.
This move is going to be another one of your openers depending on whether you’re off-tanking or main tanking. This move deals a bit of damage over time to the target and must stay up in order to achieve maximum dps. This move also helps generate enmity though not as much as the Spinning Slash.
Low Blow (Level 10)
 Delivers an attack with a potency of 100. Additional effect: stun. Duration: 5 sec (3 in PvP). Additional effect: 30% chance that the next parry will reset the recast timer.
This is your standard tank stunner. It has less recast time then the Warrior’s stun but isn’t on the global cooldown (GCD) like Paladin’s stuns are. The nifty thing about this move is that when you parry a move the stun can be used again instantly, no matter when it was casted because of this I like toy follow it up with the move Dark Dance to help increase the number of times I can use it. Especially in situations where I know that I’m going to need to use the stun often.
Syphon Strike (Level 12)
 Delivers an attack with a potency of 100. Combo Action: Hard Slash. Combo potency: 250. Combo Bonus: Restores MP.
This is going to be the opener for your DPS combo and is essential your bread and butter combo when not generating enmity. This move is absolutely necessary while under the effects of Darkside. You’ll want to get used to this move as soon as possible.
Reprisal (Level 22)
 Delivers an attack with a potency of 210. Can only be used after parrying an attack. Additional Effect: Lowers target’s damage dealt by 10%. Duration 20 sec.
This move is an interesting one because it can only be used after parrying an attack. Whenever you see it proc it’s a good idea to use it as soon as possible because it has a 30 sec recast timer, which makes it one of the less frequently used moves. However, it is also one of the most essential as it lowers all damage dealt by 10% and can be a real life saver when fighting a mob that hits for massive amounts of HP.
Power Slash (Level 26)
 Delivers an attack with a potency of 100. Additional Effect: Increased enmity. Combo action: Spinning Slash. Combo potency: 300. Dark Arts combo effect: Increased enmity. Dark Arts fades upon execution.
This is going to be your enmity combo finisher. The good news about this move is unlike Spinning Slash, you don’t have to use it off a combo to get the additional enmity although the move will take a massive damage hit if not used that way. This move also harnesses Dark Arts so you can use that to further increase your enmity. When using the enhanced version of Power Slash in a combo you generally get enough enmity to last the entire fight. As far as using the enhanced version without a combo, I typically use it to generate quick enmity on a mob that is starting to lose it. Because DA essentially doubles the amount of enmity produces it makes it a great move to use on the fly.
Souleater (Level 38)
 Delivers an attack with a potency of 100. Combo action: Syphon Strike. Combo potency: 260. Dark Arts potency: 240. Dark Arts combo potency: 400. Grit effect: Absorbs 100% of damage dealt as HP. Dark Arts fades upon execution.
This is one of your two options for your dps finisher and one of your best tools for mitigation. Souleater has the wonderful effect of letting you restore your damage as HP when using this technique under the effect of grit. When not using grit however it is simply a combo finisher so make sure you have grit up if you need the healing effect! Interestingly enough it also has some utility outside of grit as when used with Dark Arts it is your most potent combo finisher. Currently with my ilvl 168 DRK my Souleater combo while under the effects of Dark Arts does about 1100 points of damage on average. Not a bad amount of damage if I do say so myself. Couple this with the healing effect and you get that 1100 back. Just remember to keep an eye on your MP when spamming this combo.
Delirium (Level 50)
 Delivers an attack with a potency of 100. Combo action: Syphon Strike. Combo potency: 280. Combo bonus: Reduces target’s INT by 10%. Duration: 20 sec. Effect does not stack with Dragon Kick.
This move is your other option for your dps combo finisher. Delirium has the ability to lower the target’s intelligence stat making non-physical moves do less damage. The only downside to this move is that it doesn’t stack with the Monk job’s Dragon Kick so no lowering the enemies stats by 20%. It’s best to work this move into every other rotation to keep mitigation strong, but be wary on which mobs you use it on as not every mob has magic based attacks.
Plunge (Level 54)
Delivers an attack with a potency of 200. Cannot be used while bound.
This move is one of my favorites simply because it looks awesome, but it’s effective too! Plunge is your long-range physical move that works similar to Unmend. Use this when you want to approach a mob but want to conserve MP. You can also use it when you want to do a little extra damage in your combo as this move isn’t on the GCD. The only thing that you really need to watch out for is using it during enemy attacks. If you use this move in an orange area your still going to get hit (similar to Dragoon’s various jumps for example) so watch where you’re plunging!
Carve and Spit (Level 60)
 Delivers a threefold attack with a potency of 100. Also restores MP if not used under the effect of Dark Arts. Dark Arts potency: 450. Dark Arts fades upon execution.
This move comes in handy for a lot of different situations. It is effectively the strongest move in the DRK’s repertoire and is very handy in both critical and average situations. Carve and Spit, while under the effects of Dark Arts delivers three powerful strikes to the opponent, each registering as their own strike, however DA will only fade after all three hit so don’t worry about losing damage. As far as the MP restoration goes, it actually gives back a solid amount of MP and can be used as the “MP emergency button” if necessary. On average I gain about 900 MP back each time I use the move. Since the move is off of the GCD you can use it in the beginning, middle, and end of any combo, however this move has a one-minute recast timer so using it effectively is key.
Magic Abilities
Next up we have the DRK’s magic abilities. All of them use MP and some of them can be enhanced by Dark Arts. Always make sure to keep an eye on your MP when using abilities that consume MP. You don’t want to run out of gas in the middle of a boss fight or big pull.
Unleash (Level 8)
Deals unaspected damage with a potency of 100 to all nearby enemies. Additional Effect: Increased Enmity.
This move is going to be your main way of generating enmity when dealing with large groups of enemies. It doesn’t need much MP to use and it can sometimes be cast for free when using Unmend. As a rule of thumb, I generally like to throw up Blood Price to help maintain MP when using this move in large groups.
Unmend (Level 15)
Deals unaspected damage with a potency of 150. Additional effect:  Increased enmity and 30% chance that the next Unleash will cost no MP. Duration: 15 sec.
This move is going to be your best option not just for attacking far away mobs, but also generating enmity. It has a pretty short recast timer so you’ll use this more than Plunge, but it doesn’t do as much damage.
Dark Passenger (Level 40)
Deals unaspected damage with a potency of 150 to all enemies in a straight  line before you. Can only be used when under the effects of Darkside. Dark Arts potency: 250. Dark Arts effect: blind. Duration: 15 sec. Dark Arts fades upon execution.
This move is very useful when dealing with mobs that use more physical attacks. While under the effects of DA this move can blind several enemies at once making them miss several attacks. While normal this move does a good amount of damage and should be added into your big pull rotation. Just make sure to keep them all lined up.
Abyssal Drain (Level 56)
 Deals unaspected damage with a potency of 120 to a target and all enemies near it. Additional effect: Increased enmity. Dark Arts effect: Absorbs 100% of damage dealt as HP. Dark Arts fades upon use.
This move should be worked into your rotation as often as possible.When used with DA, this move can drian 100% of your damage into HP on ALL targets. It does have a pretty lengthy cooldown so keep an eye on it. Also be sure to watch how much MP you use because this one can be a little costly.
Defensive Cooldowns
The DRK has a lot to work with in terms of defensive cooldowns, although not as much as the Paladin. In order to properly mitigate damage, dont just pop all of them at once. Watch the situation and use the appropriate cooldown as necessary. I cannot stress this enough: PAY ATTENTION TO WHATS GOING ON AND ADJUST ACCORDINGLY! That being said let’s see what we’ve got.
Shadowskin (Level 2)
Reduces damage taken by 20%. Duration 20 sec.
Nothing too fancy about this one. Just a straight damage reducer. It’s important to note that this does include magic damage as well, so don’t go and pop Dark Mind before this one is finished. I tend to use this when pulling big mobs or when a tank buster is on the way. It last for a good amount of time so its a pretty safe cooldown to use.
Blood Weapon (Level 18)
Increases the attack speed of abilities by 10% and converts physical damage into MP. Duration: 15 sec.
Cannot be used while under the effect of Grit. This is going to be the cooldown that you’ll use when off tanking. This move is glorious to use not just when low on MP but also just in general due to the attack speed increase. I’m still doing research as to whether it plays a part in skill speed at all, as that will effect how much damage your DoT moves like Scourge can do. Even if it doesn’t though, Blood Weapon is an off tanking necessity.
Darkside (Level 30)
MP is slowly drained while increasing damage dealt by 15%. MP refreshing statuses have no effect. Effect ends upon reuse or when MP is 0.
This one is a little different because it can also be classified as a “stance”. Darkside in many ways is your dps stance increasing damage dealt by 15%. There are also a few moves that can only be used while in this stance. One of the perks about being a DRK is that this stance can be combined with Grit, the DRK’s tanking stance. Usually when a tank enters a tanking stance they get increased defense with a drop in damage dealt by about 20%-25%. DRKs however only get a 5% reduction in damage when combining the two making them one of the stronger main tanks in the game. It’s important to note that Darkside drains MP for EVERY ACTION. Meaning that when you perform a move your MP will drop so using the MP draining techniques mentioned earlier are essential to keep Darkside active. Remember some moves can only be activated while under the effect of Darkside so do when your MP is running low pop a Carve and Spit or use the Syphon Strike combo to get that MP back.
Grit (Level 30)
reduces damage received by 20%, while lowering damage dealt by 20% and increasing enmity. Also increase chance to hit by 5%. Effect ends upon reuse.
This is your tank stance move. ALWAYS have Grit active when main tanking. Trust me. DRKs aren’t squishy but it will make it easier on your healers, and 5% really isn’t enough of a damage increase to warrant wiping several times. Grit is extremely useful for maintaining enmity as it constantly generates when in this stance. As for the “chance to hit” I’m still not entirely sure what it means by this. Part of me thinks that it increases the chance to cause a critical hit by 5%, another thinks it adds an extra hit to the character’s auto-attack. Im not entirely sure so don’t quote me on this but I think it may be the former. Again I’m still doing research into this as most players still don’t have a very good idea of what it means. Again it could always just be a typo.
Dark Dance (Level 34)
Increases parry rate by 30%. Can only be executed while succumbing to the Darkside. Duration: 20 sec. Dark Arts effect: Evasion increased by 20%. Dark Arts fades upon execution.
This move is one that I use quite often. Since parry is the only stat that the DRK uses to mitigate damage, I like to have this up as often as possible (though I don’t stack with Shadowskin). Dark Dance is also useful for making Low Blow active again, and I often pop it as soon as I use it. While under the effect of Dark Arts, it also adds 20% evasion making it possible to avoid magical attacks as well. I would recommend always using DA when popping this cooldown because the parry is nice, but parry and evasion is even better.
Blood Price (Level 35)
Restores partial MP when damage is taken. Duration: 15 sec.
Blood Price is another one of my favorites to use when pulling big mobs, or multi-hit attacks. Despite the description saying it only restores partial, it actually restores quite a bit of MP to the player. Couple that with getting hit multiple times and you can be back up to max MP in no time. It also has a pretty fast recast time so on those super large pulls you may be able to pop it two or three times!
Dark Mind (Level 42)
 Reduces magic vulnerability by 15%. Can only be used when succumbing to the Darkside. Duration: 10s. Dark Arts effect: Increases magic vulnerability reduction to 30%. Dark Arts fades upon use.
This cooldown, to me, is the emergency button for big magic attacks or when pulling a mob that primarily uses magic (i.e. wind sprites). DRKs already have a little more magic invulnerability than the other tanking jobs and this helps even more. Like Dark Dance I would suggest only using it under the effects of Dark Arts not only because it increases from 20% to 30%, but also because it only lasts 10 seconds and has a one minute recast timer. So there will be no spamming of this one.
Dark Arts (Level 45)

Attune with the darkness within you, increasing the potency of several actions. Can only be used under when succumbing to the Darkside. Effect ends if Darkside is cancelled. Duration: 10 sec.
Not really much to say about this one. This will be your opener for most of your “Dark” techniques and should be weaved into your rotation. The biggest thing about this move however is that it costs a TON of MP to use (about 1/5 if my math is right) so I would recommend using it every other MP rotation. Also when using it, know what you want to use it on before hand. In the endgame some of the fights can get pretty hectic and while it only has a recast time of 5 seconds, those moments can be the difference between victory and defeat. Watch the situation and adjust as needed. Also I tend to not use it when my MP is below 3/4. Mostly because even if you can cast it, you’re left with a sliver of MP that will probably disappear after using Hard Slash. Just wait it out. Do a couple of Syphon Strike combos first.
Shadow Wall (Level 46)
Reduces damage taken by 30%. Duration: 10 sec.
Not much to say about this one either. I compare it to a Paladin’s Sentinel. If you see a really big hit coming, then throw up Shadow Wall. Just make sure you time it right, because you only have 5 seconds.
Living Dead (Level 50)
Grants the effect of Living Dead. When HP is reduced to 0 while under the effects of Living Dead, instead of becoming KO’d, your status will change to Walking Dead. Living Dead duration: 10 sec. While under the effect of Walking Dead, most attacks will not lower your HP below 1. If, before the Walking Dead timer runs out, HP is 100% restored, the effect will fade. If 100% is not restored, you will be KO’d. Walking Dead duration: 10 sec.
This is your “invincibility button”. The catch is that it’s a little tricky to use and I seriously recommend using a macro for this one. Like the description says, if HP is reduced to 0 while under the effect of Living Dead, Walking Dead will become active. Now for the HP restored, it only has to be 100% worth of HP restored. This means that the even if you’re constantly taking damage while under the effects of Walking Dead, as long as the healer heals you for your total HP, then you will not be KO’d. It is important to note that not all moves are survivable while under Living Dead status. It still isn’t clear what kind of moves do finish the job, but you’re not entirely safe while under this effect. From what I have encountered myself, it seems to be mostly big boss moves that have DoTs but I could be wrong. As I find out I will update this.
Salted Earth (Level 52)
Creates a patch of salted earth, dealing unaspected damage with a potency of 75 to any enemies who enter. Duration: 21 sec. 
This is another DoT for the DRK and should be kept up at all times. Not only does it have a higher DoT potency than Scourge, but it also has no MP or TP costs, and hits multiple enemies making this the go to group pull cooldown. I also use it when fighting single targets as well because it helps with dps and the recast timer (45 seconds) isn’t to bad when looking at the amount of damage given.
Sole Survivor (Level 58)
 Marks a target with the status “Another Victim”. If that target should be KO’d in battle, 20% of your maximum HP and MP will be restored. Duration 15 sec.
Last but certainly not least is Sole Survivor. Initially many players thought that the target described was a fellow party member. This isn’t true. Think of it like the Warrior’s Mercy Stroke. Just pop it on an enemy that’s about to die, kill it in 15 seconds and reap the rewards. It’s a great move to use in boss fights, raids, big pulls, or really any situation with more than one enemy. The only important thing to note is that you have to give the ability time to cast. It takes about 2 or 3 seconds before the enemy is marked and if you use it on a mob that’s at 5% your not going to get the HP and MP back. I generally throw it up at around 10-12% just to be safe. Also if you want you can assign it to a macro so you can let your party know to focus on it and get it down quicker.
Hopefully this guide was of some use to you guys! As we continue to progress and more patches and hot fixes release, I will continue to write guides for the best tanking job in Heavensward. If you guys have any questions be sure to leave them in the comments below. Thanks for reading!







Published: Jul 4, 2015 12:31 pm