The Plucky Squire is a simple and delightful adventure, but it’s not without some challenges. Glitchbirds are hidden in each chapter, and you’ll have to find them all if you want to complete all of the game’s achievements/trophies. Follow our guide below to rescue each of the ten glitchbirds.
All 10 Glitchbird Locations in The Plucky Squire
Chapter 1

The first glitchbird is found very early in the game and is impossible to miss. You’ll come across it out in the open shortly after Violet joins Jot on the way to Tome Tower. It’s waiting for rescue behind a sign.
Chapter 2
This is the first glitch bird that’s hidden, and signals to you that not all glitchbirds will be as obviously found as the one in Chapter 1.
On the pages where Jot is attacked by green lightning creatures, there’s a ruined wall towards the top of the page. Walk behind the wall from the left side and the wall will become invisible, revealing the hiding glitchbird waiting for rescue.
Chapter 3
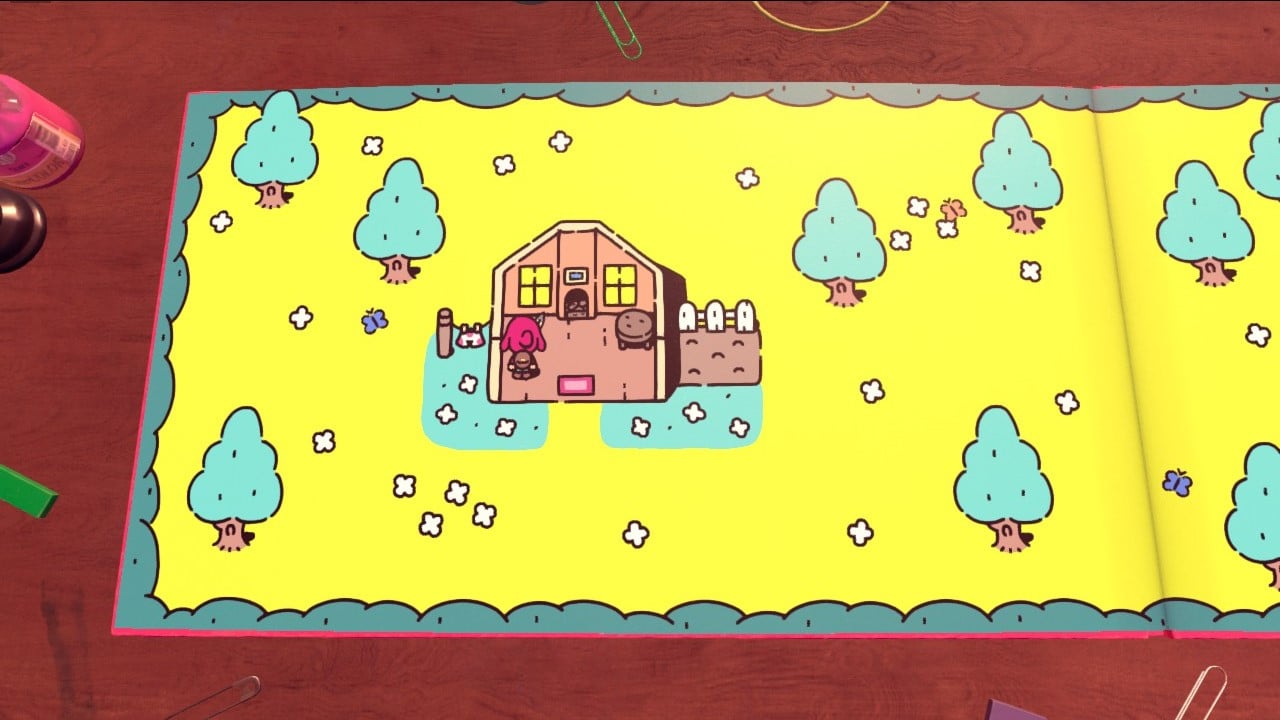
When Jot is tasked with finding Moonbeard’s drink, skedaddle on over to Jot’s house on the left page. Enter it and you’ll instantly come across the glitchbird.
Chapter 4
This glitchbird is hidden deep within Chapter 4 and is easily missable. Progress the chapter until you acquire the bow and arrow outside the book on Sam’s desk. Finish the minigame inside the book and head forward until you’re in a city populated by snails who need your help collecting some lost books. Exit the storybook via the portal on the left.
Outside of the book, turn a few pages back to the spread with snails living inside the tree on the right page and an inky black page on the left. Walk over the black page to reveal a hidden portal. Hop inside and rescue the glitchbird.
Chapter 5
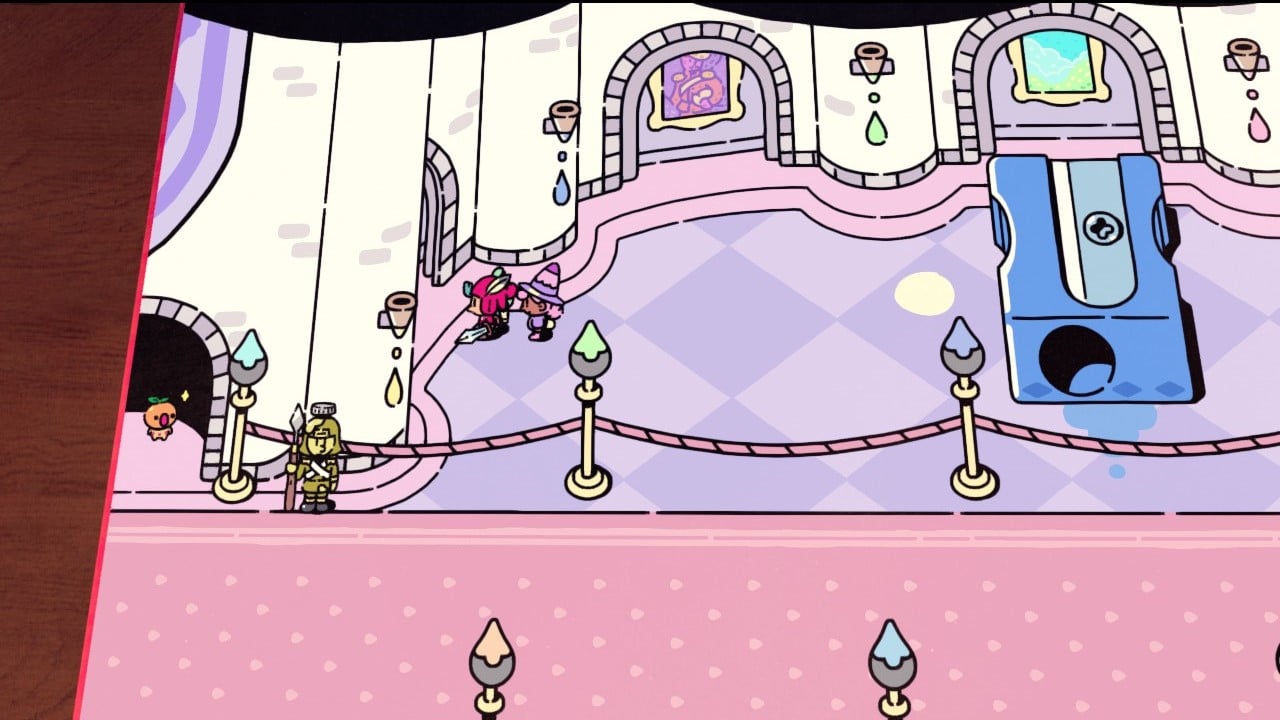
Chapter 5’s glitchbird is in plain sight in the queen’s castle on the left-hand side. However, a guard won’t let you pass to rescue it. No matter – there is a doorway slightly hidden by a column directly above the guard on the other side of the rope. Walk through the arch and you’ll enter the little room with the glitchbird.
Chapter 6
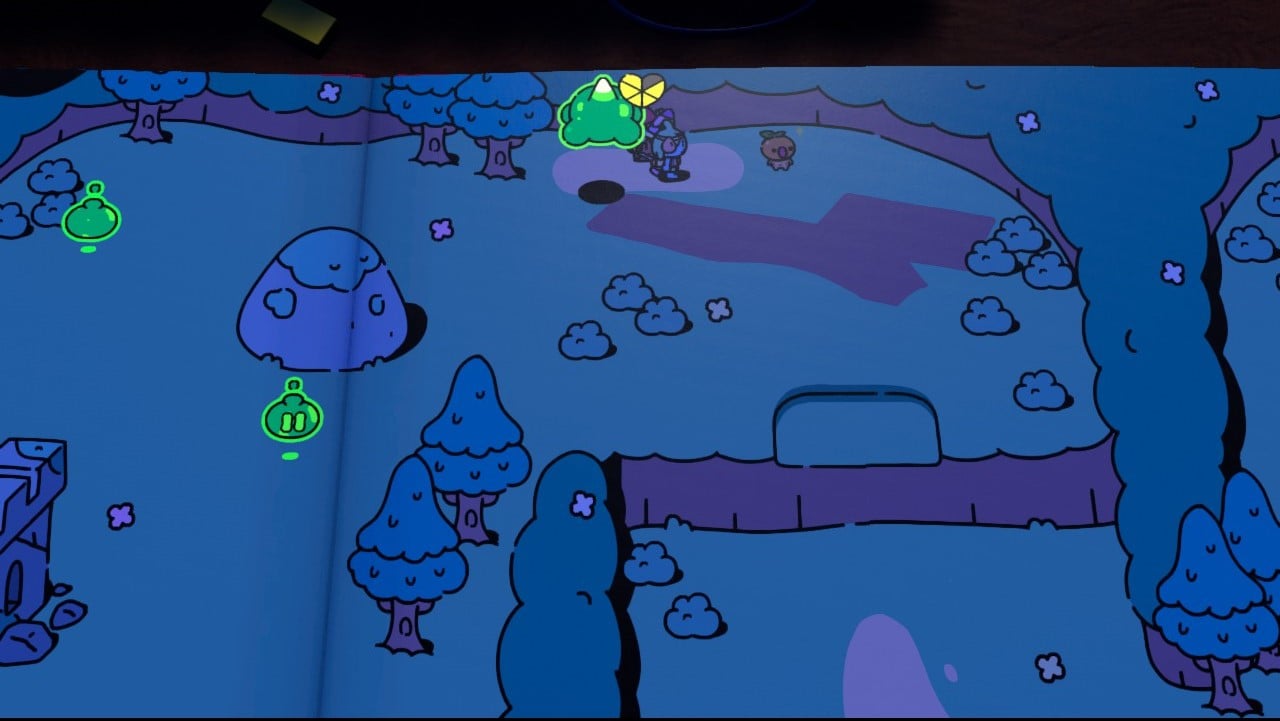
During your travels on Trarrg Mountain, you’ll come across some of Humgrump’s forces transporting a screw. On the page Jot is on, there’s a wall of vines that you can’t do anything with just yet. Remember this location, as later on in the level Moonbeard will have specially formulated mushroom bombs for Jot that can disperse the vines. When you acquire the shroom bomb, exit the book and turn back its pages to where the rat & cheese puzzle was. Enter the portal and head down to the previous page where you can now use that bomb to kill the vines, revealing the glitchbird.
Chapter 7
The Plucky Squire teases Chapter 7’s glitchbird early on, but you can’t access it until later in the level when you’ve acquired another tool for Jot.
Continue progressing along the beach inside the book and the level on Sam’s desk until you get the bomb stamp. You’ll blow up the tanks that initially halted Jot and back track to the beach pages. Outside of the book, use the bomb stamp to blow up the metal block in front of the glitchbird and you’re all set to re-enter the book and rescue the glitchbird.
Chapter 8
After Violet defeats the mage in Chapter 8, don’t go immediately inside the castle but instead head to the left of the castle entrance. The glitchbird will be waiting in plain sight by a tree.
Chapter 9
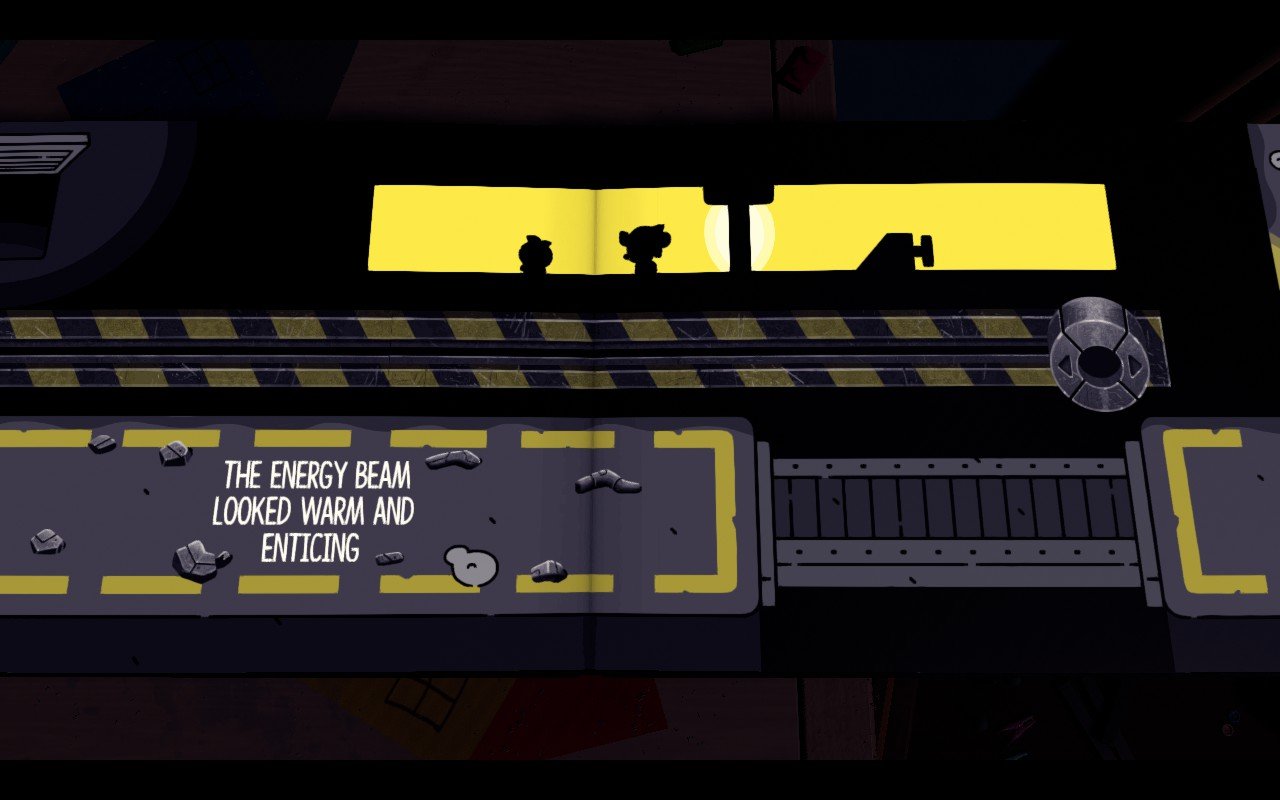
Chapter 9 is home to the final two glitchbirds. The first is found shortly after Jot breaks out of his cell in the Deep Doom. He’ll escape a deadly energy beam with Pip the mouse’s help. After Pip gets Jot up to speed, walk to the yellow light on the left to enter the room Pip was just in. Keep walking toward the left and a glitchbird will be unveiled in a hidden room.
The second glitchbird in Chapter 9 and final overall is located toward the very end of the game after reuniting with Jot’s allies and escaping the Deep Doom. After entering Humgrump’s palace, head to the right. The glitchbird is located behind the valve poking up from the floor.
Now that all the glitchbirds have been rescued, you’re free to complete the game, defeat Humgrump, and earn the platinum trophy. That is, if you followed our guide on collecting all 50 art scrolls in The Plucky Squire, which will unlock another achievement/trophy.


Published: Sep 20, 2024 10:34 am