Currently, there are nine bosses in Dead Cells and its DLCs that drop some amazing rewards when killed. Each of the bosses requires different tactics, so there is no universal approach towards all of them.
If you want to know the most effective ways of killing all four bosses in Dead Cells, then follow our guide below for all the tips and tricks. You will learn about their vulnerabilities, which can be used to quickly deal with all of them.
How to Beat All Bosses in Dead Cells
The Concierge

You will encounter the first boss at the Black Bridge. Although, it’s not that hard to beat Concierge, it would be still good to know what to expect from his side.
The Concierge is rather slow and his most powerful attack is probably the Fire Strike that sends a wave of fire over the ground. Also, don’t stay too close to him or he will use Shout, which can stun you.
The best strategy against Concierge is to use Heavy Turret and grenades. At the same time, you will need to move a lot and dodge his attacks. When you see an opportunity, throw a bomb at him and let the turret do the rest.
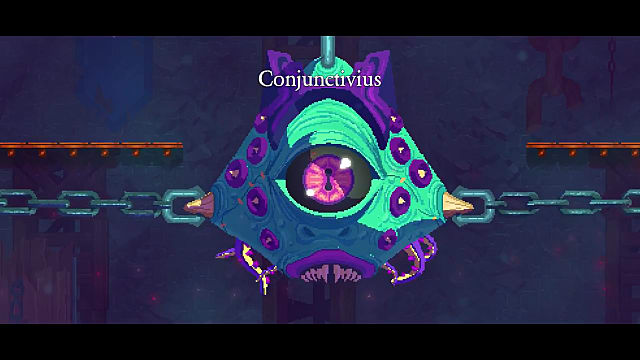
Conjunctivius

The alternative first boss can be encountered in the Insufferable Crypt, which can be accessed through Ancient Sewers if you already have three boss cells. The whole fight will take place on platforms and in four phases.
During the first phase, you need to dodge its laser beam that shoots from the eye. As for weapons use a whip or a spear that can deal burning damage, which is especially effective against Conjunctivius, including grenades.
The second phase starts after you put it down to 75% of health. This is when it starts letting out its first tentacle from beneath the ground. Use shield to parry it or just dodge.
The third phase starts at 50% of health. The same types of attacks repeat, but with an additional tentacle. And the final phase is the most dangerous one, which starts at 25% health with three tentacles that move really fast.
It’s going to be really hard to dodge and parry all three of them, so just watch out for the patterns on the ground and jump onto the platform. If you can hit Conjunctivius in the process, you should put him to zero rather quickly.
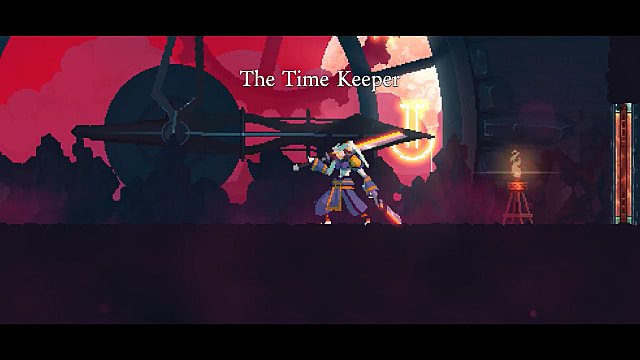
The Time Keeper

The third boss in the game resides in the Clock Room at the Clock Tower. This boss is extremely fast and she uses teleportation, so it’s going to be really hard to dodge her attacks. The fight consists of three main phases.
Each of the phases starts after the Time Keeper loses a third of her health. All of her attacks consist of a sword attack, a shuriken throw, a hook pull, and teleportation. If you can adjust your attacks to her patterns, you will easily kill her.
Use Ice Grenades to freeze her and then hit her as she stands still. Also, make use of Infantry Grenades or any other grenades you have unlocked. They will help you reduce the life total of the boss.
As for the weapon, it’s better to use long-range weapons, such as bows or crossbows. It’s also a good idea to stay away from the boss as far away as possible because if her hook catches you, it can deal a lot of damage. So stay away from it as well as you can.
Remember that each phase adds additional sword combos and shurikens to her attacks, so be aware of it the lower her life total gets and keep the pressure going.
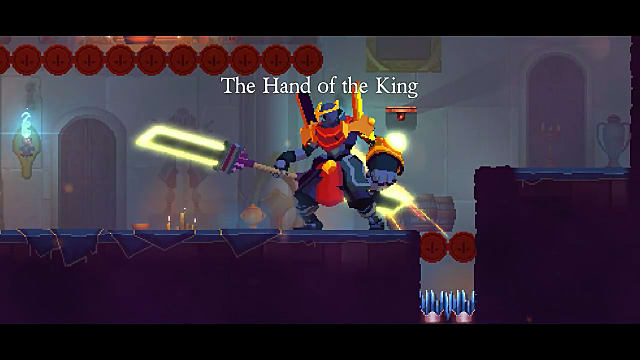
The Hand of the King

The final base boss in Dead Cells can be encountered at the Throne Room. Just like the previous boss The Hand of the King has three main phases and two transitional ones, where you will fight hordes of elite zombies.
In the first phase, his two main attacks are dash and slash, which can be easily dodged. But then he will throw bombs at you, which you can escape by jumping over his head and staying behind him.
Since this boss is immune against any types of freeze effects, use fire and poison damage. The best weapon for this fight is the Explosive Crossbow that shoots fire explosives that deal a lot of critical damage from a distance. Fire Brands is another great choice of weapon for burning damage.
During the second phase, after you’ve cleared the first wave of zombies with the help of Heavy Turret and Double Crossb-O-Matic, in addition to his other attacks and bombs The Hand of the King will summon deadly explosive banners. You need to destroy them or they will explode and deal a lot of damage to you.
Since the arena where you will fight the final boss is very small, you will not be able to effectively escape the explosions. So take care of those banners and hopefully, you will survive for the third and final phase.
In the third phase, the boss will add a hand slam that can be easily dodged by jumping on top of the platform. Just keep an eye out on his hand, and when it starts glowing, use it as a signal to retreat. As soon as the wave dissolves, go back down and finish him off!
Mama Tick
Mama Tick is an optional boss available only in the Bad Seed DLC. You can skip this fight entirely if you sacrifice Mushroom Boi!, which drops from Jerkshrooms, in the Morass of the Banished. But if you wish to fight her anyway, can find Mama Tick at the Nest, which can be reached only with the help of Teleportation Rune.
Since this boss fight takes place in the water, there is no point in using fire weapons. But you can use shock and freeze weapons to a great effect. The best weapon against this boss would be the Ice Shards, which deals critical damage to her, and the best skill would be Tesla Coil.
Once defeated, Mama Tick will drop the Scythe Claw, a two-handed melee weapon that inflicts critical hits.
The Giant
This boss is only available in the Rise of the Giant DLC. You can find him inside the Guardian’s Haven. You will need to use the Cavern Key, which can be found in the Prisoners’ Quarters, to open the gate of the cavern in the Graveyard, which will lead you straight to this undead boss.
The Giant is totally immune to freeze and stun effects and does not correspond to front- or back-focused weapons, such as Vorpan or Assassin’s Dagger. The best way to defeat this boss is to use ranged weapons, targeting his fists. Once the health on his fists depletes, one of his eyes will fall out. Use this window to deal critical damage to The Giant, which will last only for three seconds.
The following weapons can be used for a great effect in this fight:
- Powerful Grenade
- Double Crossb-o-matic
- Magic Missiles
- Electric Whip
When the boss is defeated, he will drop The Giantkiller sword, which is the best weapon against bosses in Dead Cells.
The Scarecrow
This alternative boss is available only in the Fatal Falls DLC. There are two ways you can find The Scarecrow. One involves wearing the Cultist Outfit, which drops from Fractured Shrines corpses, and opening the gate of the Undying Shores, which eventually leads to Mausoleum. The second one requires players to go through the Cavern.
In either case, it is very important to bring a good shield to this fight, as this boss swings his weapon a lot. The two best shields against his scythe would be Rampart or Punishment. The first one drops from the Shieldbearers, and the second one involves solving a puzzle at the Bell Tower.
Fortunately, The Scarecrow has a bad defense, so using high DPS melee weapons would be the best strategy against him. Such swords like Meat Skewer and Sadist’s Stiletto will do the job. You can get the Meat Skewer by completing the 10th round of the daily run, and Sadist’s Stiletto can be obtained as a drop from Impalers.
When this boss is finished, he will drop the Scarecrow’s Sickles, which function like a boomerang, dealing ranged critical hits and coming back to your hands.
The Servants
Before you can fight the ultimate Dead Cells boss, you need to defeat the trio of The Servants in the Queen and the Sea DLC. The three bosses are: Calliope, Euterpe, and Kleio. Each of them uses a different weapon, including Wrecking Ball, Gilded Yumi, and Bladed Tonfas. The boss fight takes place at the Lighthouse.
The entire fight can be divided into three progressively harder sections. First, you must escape spreading fire and Calliope chasing and attacking you. At the end of the first run, you will fight Calliope and once defeated, the second run starts. Then, you will need to escape both Calliope and Euterpe, ultimately fighting them both at the end. Lastly, the third run will involve all three Servants chasing and fighting you at the end of the section.
All three bosses can be easily defeated with the help of The Giantkiller sword or any other similar heavy melee weapon with high DPS. The Servants have no damage cap, which means that your critical strikes will deal enormous damage.
Once all three bosses are defeated, they will drop their weapons, which you can pick up as a reward.
The Queen
Right after the fight with the Servants, you need to climb up onto the crown of the Lighthouse for the final boss fight in Dead Cells with the Queen.
As expected, the last boss hits really hard, so try to bring either a weapon or a skill that will protect you with invincibility frames. This can be one of the following:
- Meat Skewer
- Assault Shield
- Force Shield
- Telluric Shock
Meat Skewer and Assault Shield will make you really quick. You’ll be able to parry Queen’s attacks just in time and even find opportunities for damaging her. Force Shield is another great item to have as a part of your defensive strategy, which creates a defensive energy field around you. This item can be obtained from Festering Zombies.
The Queen not only has fast attacks, but she moves fast. You can prevent her from moving so quickly by using Root Grenades and Wolf Traps. These weapon skills can stagger her for a moment, allowing you to change your position when necessary.
Lastly, when she goes all in with attacks, use this opportunity to jump behind her with the help of the Phaser teleportation skill, and strike her from behind. Once defeated, the Queen will drop her Queen’s Rapier, a quick and powerful sword just like the Queen herself.
Each of the four bosses will drop some excellent rewards, such as weapons and gear, which can be used to kill stronger enemies. That’s it on how to defeat all four bosses in Dead Cells, but be sure to check out other related guides at GameSkinny!


Published: Aug 10, 2018 11:37 am